Scientific Solutions ® Inc.
Ribbon Cable Bracket Assembly

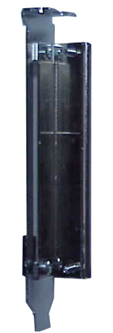
Scientific Solutions Ribbon Cable Bracket Assembly.
The Scientific Solutions Ribbon Cable Bracket Assembly is a chrome plated steel bracket that is attached to a computer circuit board. This Bracket Assembly is used on the BaseBoard / ISA, LabMaster DMA and the LabTender / ISA computer interface boards. The bracket is mouned on these boards and secures the boards inside of the computer. A square cut-out in the bracket permits multiple ribbon cables to be attached to the computer card and exit the back of the computer. The bracket clamps the ribbon cables to provide shielding and also strain relief.

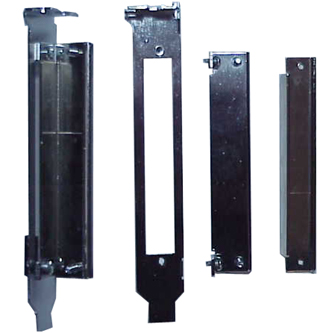
Bracket Assembly (left) and the three parts of the assembly.
The Bracket Assembly consists of three main parts
- Board Retaining Bracket
- Cable Clamp
- Strain Relief clamp
Board Retaining Bracket

Board Retaing Bracket with square cut-out for ribbon cables.
The board retaining bracket attaches directly to the computer interface card (BaseBoard / ISA, LabMaster DMA, or LabTender / ISA). Two screws attach the bracket to the card. Once secured to the interface card, this bracket does not have to be removed in order to install the interface card into the computer. The bracket has a tab and hole at the top for an additional screw to secure the card in the computer slot. Ribbon cables are fed thru the rectangular cut-out of the bracket and attach to the computer interface card.
Cable Clamp

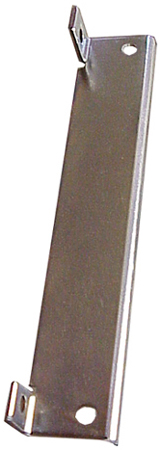
Cable Clamp Bracket
The cable clamp part of the bracket assembly provides 1/2 of the clamping and strain relief to the ribbon cable. The Cable Clamp attaches directly to the Board Retaining Bracket.
Strain Relief Bracket

Strain Relief Bracket
The Strain Relief Bracket along with the Cable Clamp Bracket are the actual parts of the Bracket Assembly that provide the shielding and strain relief. The Strain Relief Bracket attaches directly to the Cable Clamp Bracket.
Installing a Card that uses the Ribbon Cable Bracket Assembly
- When you get a new computer interface card, the Bracket Assembly will already be attached to the card. To install the card in your computer, you will have to remove both the Cable Clamp and the Strain-Relief Bracket from the Board Retaining Bracket. Remove the two screw that secure the Strain-Relief Bracket to the Cable Clamp. Set the screws aside for use later in replacing the Strain-Relief Bracket. Remove the two screws that attach the Cable Clamp to the Board Retain Bracket. Also set these screws aside in a safe place for later use in re-attaching the Cable Clamp.
- Choose the slot in your computer to install your interface card. Remove the slot cover by loosening and removing the screw at the top which holds it in place and set the slot cover and screw aside. The screw will be used later to attach the Board Retaining Bracket to the computer
- Install the interface card in the computer and then use the screw you just set aside to secure the interface card to the computer by installing the screw in the Board Retaining Bracket.
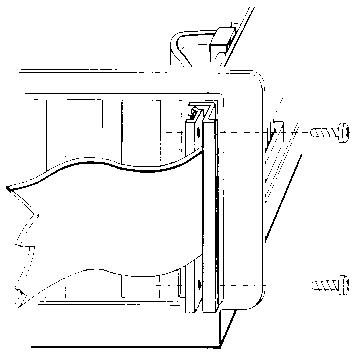
- Reattach the Cable Clamp to the Board Retaining Bracket as shown in the following diagram:

- Slide your ribbon cables thru the cut-out of in the bracket and attach to the computer interface card. Note that the order you install cables is important. Install the cables first that connect on the interface card closer to the bracket and then install the cables working your way to the connectors on the other end of the card
- Reattach the Strain Relief Bracket to the Cable Clamp. The cables should pass between the Cable Clamp and the Strain-Relief Bracket. This "clamping" of the cables will insure that stress on the cables from pulling will not bend or damage the cable connections. Some ribbon cables may have an exposed mesh shielding, and if so the mesh shielding should be folded back and clamped between the Cable Clamp and the Strain-Relief Bracket to insure proper shielding.

Specifications subject to change without notice.
Scientific Solutions liability, trademarks, and export notices apply.
Copyright © 1972-2025 Scientific Solutions - All rights reserved.