
Scientific Solutions ® Inc.
LabMaster ® DMA Screw Termination DeskTop
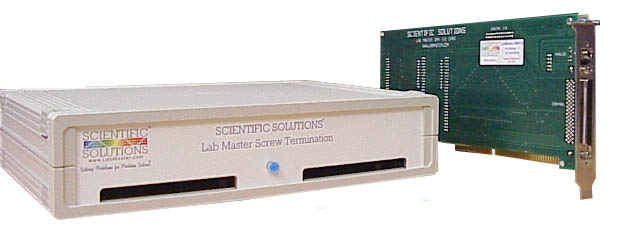
Scientific Solutions LabMaster DMA Interface card with Screw Termination DeskTop unit

Inside the DeskTop unit is the External ADC card and the Screw Terminal board
Description of the LabMaster DMA Screw Terminal Product
The LabMaster DMA product consists of two cards
- The LabMaster DMA PC Interface which is installed inside the computer
- The LabMaster DMA External ADC card which is normally housed in a DeskTop unit away from any internal computer noise. In this configuration we have also added a full custom screw terminal inside the DeskTop unit.
The DeskTop unit has a screw terminal pair (signal and ground) for every LabMaster DMA signal including:
- Analog Input
- 16 signals, Ain 0 to Ain 15
- Can operate as Single-Ended or Differential Pairs (0-8, 1-9, 2-10, ..7-15)
- Analog Output
- 2 signals, Aout 0 and Aout 1
- Digital I/O
- 24 signals
- Digital I/O Ports A, B and C (8-bits each port)
- Counter/Timer
- 16 signals
- Out 1 thru Out 5
- Source 1 thru Source 5
- Gate 1 thru Gate 5
- Fout
- Control Signals
- 6 signals
- External Start-of-Conversion, Conversion Done
- Digital +5 volts, Logic +5 volts, Analog Ground, Digital Ground.
A light on the front of the DeskTop until illuminates when the computer power is on.
LabMaster DMA Screw Terminal DeskTop unit:
The DeskTop unit is about 11" wide x 7" deep x 2" high (280mm x 180mm x 50 mm). The front of the DeskTop unit has slots for signal wires.
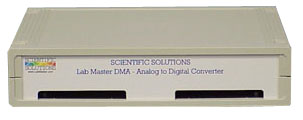
Front View of the DeskTop unit with slots for screw terminal wires
Inside the DeskTop unit is a full screw terminal. To access the screw terminal, clips in the four corners of the top are "popped off" with a small flat-bladed screw driver. Under each clip is a philips screw that is also removed. Be sure to save and not loose the screws as they are metric thread and difficult to replace.

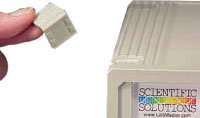


There are two cards inside the unit, the LabMaster DMA External ADC and the Screw Terminal card. These two cards are connected with ribbon cables, so when the top is lifted off it is best to place it behind the unit. Try to keep the front and back panels on the bottom piece and fold the top over towards the back.
Also the Screw Terminal Board internal to the DeskTop Unit includes all the header connections that are on the LabMaster PC Interface card for those applications that require ribbon cable connections. It provides the best of both worlds - an easier cabling to the PC Interface along with compatible ribbon cable connections for your existing equipment.
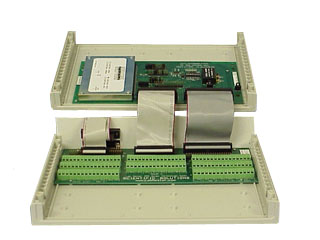
Inside View of the DeskTop unit showing External ADC card and the Screw Terminal Board

Close Up View of the Screw Terminals inside the DeskTop Unit
The Back of the DeskTop unit has connections for the LabMaster DMA PC Interface. There are four connectors on the back of the DeskTop Unit. Three of them are used to connect to the LabMaster DMA PC Interface. The fourth connection is the Port C Digital I/O signals and is here just for convenience for certain applications.

Back View of the DeskTop unit showing connections for the LabMaster PC Interface
Connecting the LabMaster DMA PC Interface to the DeskTop unit:
In the past, users of the LabMaster DMA used ribbon cables from the LabMaster DMA PC Interface (located inside the computer) to external devices. The same ribbon cable connections are still available on the PC interface to support customers using this arrangement. However, for this product we have also added a special card - The LabMaster DMA I/O card - that snaps directly onto the LabMaster DMA PC Interface and converts the many ribbon cable header connectors to a high density connector.
This arrangement allows us to fully support customers who have been using the ribbon cable connections for many years with our standard LabMaster DMA PC Interface in addition to adding enhanced products such as the Screw Terminal DeskTop unit that use more convenient "quick-disconnect" round cables. The LabMaster DMA I/O card replaces the several ribbon cables with a high-density round cable that permits quick and easy connection between the PC expansion card and the desktop unit.
There are jumpers and switch blocks on the LabMaster DMA PC Interface that are used to configured some of the features of the product. The cards are separated to configure the card and then are snapped back together for installation in the computer.

LabMaster DMA PC Interface and I/O card shown separated.
With the I/O card attached to the LabMaster DMA PC Interface there are three connections available:
- High density connector on the back of the card
- External ADC data and control for the Analog Input signals
- Counter / Timer Signals
- 8 Digital I/O signals (Port A bits 0-3 and Port B bits 0-3)
- Control Signals such as Start-of-Conversion and End-of-Conversion
- MiniJack 3.5mm (1/8 inch) Connector on the back of the card
- Two Analog Output signals from the PC Interface to the DeskTop unit.
- A 26 pin header connector on the top of the card (between the PC Interface and the I/O card)
- All of the Digital I/O signals are on this connector
- Port A bits 0 to 8, Port B bits 0 to 8 and Port C bits 0 to 8
- Accommodates a DB25 connection
The DeskTop Unit connects to the LabMaster PC interface using three cables (all supplied with the unit!!):
- High Density round cable ("quick-connect")
- 3.5mm cable
- 25 pin round cable (connects to the 26 pin header on the LabMaster I/O card)
Most applications only require the High-Density Round Cable and the 3.5mm cable. The additional 25 pin Round Cable is for those applications that require all 24 Digital I/O signals. With only the High-Density Round Cable and the 3.5mm cable you have access to all of the Analog In, Analog Out, Counter/Timer, Control and 8 bits of Digital I/O.
For those applications that require all 24 of the Digital I/O signals, then a cable is connected internal to the computer from the I/O card to a standard DB25 connector on an ISA bracket (included with product). The connector and bracket mount in another slot location of the computer. Then a 25 pin external round cable (also included with product) connects from the DB25 connector on the bracket to the back of the DeskTop Unit. Although many applications do not need this additional Digital I/O capability, all the cables are included so you always have the option.
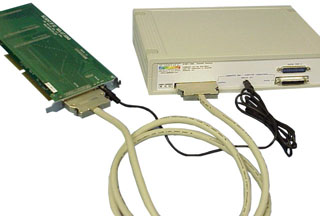
LabMaster DMA PC Interface shown connnected to the DeskTop unit
Specifications subject to change without notice.
Scientific Solutions liability, trademarks, and export notices apply.
Copyright © 1972-2025 Scientific Solutions - All rights reserved.