
Scientific Solutions ® Inc.
LabMaster ® DPCI Ribbon Cable Connections
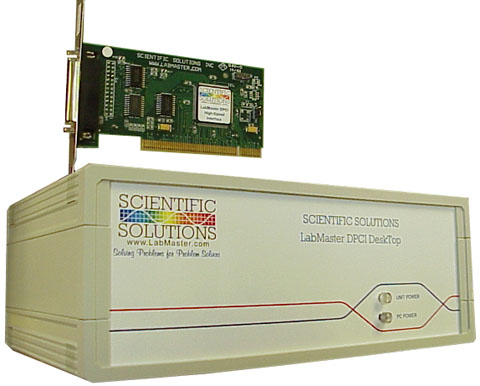
Scientific Solutions LabMaster DPCI Interface card with Ribbon Cable DeskTop unit
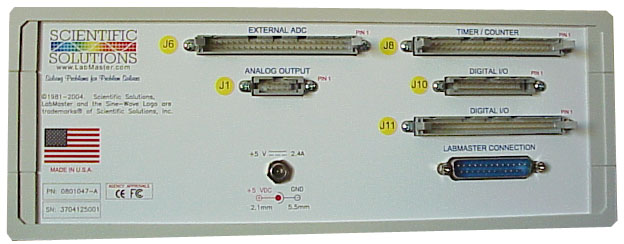
Back of the DeskTop unit with Ribbon Cable Connections
Description of the LabMaster DPCI Ribbon Cable Product
The LabMaster DPCI product consists of two cards:
- The LabMaster DPCI PC Interface which is installed inside the computer
- LabMaster DPCI External card which is housed in a DeskTop unit away from any internal computer noise.
In this configuration, the DeskTop unit contains Ribbon Cable Header connections that are the same size and pin out of the LabMaster DMA/ISA product. This allows current ISA customers to utilize their existing ribbon cables and literally unplug them from their ISA product and connect them to the DeskTop unit.
The DeskTop unit has the following Ribbon Cable Header connections on the back:
- Analog Input
- 16 Analog Input signals
- J6 Header Connector is either 40 pin or 50 pin
- 40 pin Header Connector if the DeskTop unit contains an A/D converter
- 50 pin Header Connector if the DeskTop unit is using an external A/D converter
- This is for situations where the ADC is mounted in some specialized equipment
- Analog Output
- 2 Analog Output signals
- J1 is a 10 pin Header Connector
- Digital I/O
- 24 signals
- Digital I/O Ports A, B and C (8-bits each port)
- Two Header connectors are provided:
- J10 is a 26 pin Header Connector
- J11 is a 50 pin Header Connector
- 24 signals
- Counter/Timer
- 16 signals
- Out 1 thru Out 5
- Source 1 thru Source 5
- Gate 1 thru Gate 5
- Fout
- 16 signals
- J8 is a 50 pin Header Connector
The Back of the DeskTop unit has also has connections for the LabMaster DPCI PC Interface and for the power supply. The LabMaster connection is a DB25 pin connector. The power supply uses a 2.1mm positive center post connection. The LabMaster DPCI requires a 5v power supply that is also provided with the unit.
All of the data acquisition cirucits A/D, D/A, Digital I/O, Counter/Timer are external to the computer and are controlled by the LabMaster DPCI card in the computer using a single quick-connect round cable. The LabMaster DPCI is 100% register level compatible to the original PC LabMaster product introduced in 1981.
LabMaster DPCI DeskTop Unit:
The DeskTop unit is about 11" wide x 7" deep x 4" high (280mm x 180mm x 100 mm). Two lights on the front of the DeskTop Unit illuminate to indicate the presence of power. One light indicates the power supply is connected and turned on, and the other light indicates the computer is connected and turned on.
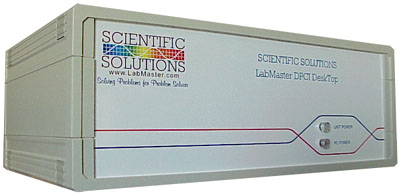
Front View of the DeskTop unit
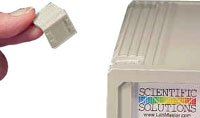
Inside the DeskTop unit are the various electrical circuits along with some switch and jumper positions that are used to customized the unit for particular software. To access the inside, clips in the four corners of the top are "popped off" with a small flat-bladed screw driver. Under each clip is a philips screw that is also removed. Be sure to save and not lose the screws as they are metric thread and difficult to replace.



The LabMaster DPCI Card:
The LabMaster DPCI card is a small card that installs into a 32-bit PCI slot. It is approximately 2" x 4" (50mm x 100mm). The card has a single DB25 socket connector.

LabMaster DPCI Computer Interface shown
Connecting the LabMaster DPCI and the DeskTop Unit:
To connect the LabMaster DPCI and the DeskTop Unit, use the following steps:
- Install the LabMaster DPCI card into your computer
- Attach the power supply (included) to the DeskTop unit.
- Notice that with the power supply connected the front panel power supply light illuminates.
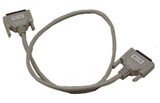
- Connect the cable (also included) between the LabMaster DPCI card installed in the computer and the DeskTop unit.
- Turn the power ON to your computer.
- Now note that the front panel computer light of the DeskTop Unit is now also illuminated. The DeskTop unit requires both the power supply to be connected AND the computer to be on in order to provide power to its internal circuits. The DeskTop unit automatically powers on when the computer is on and automatically turns off when the computer is off.

|
|
| DeskTop Power Supply (Included with Product) |
LabMaster DPCi to DeskTop Cable (Included with Product) |
Specifications subject to change without notice.
Scientific Solutions liability, trademarks, and export notices apply.
Copyright © 1972-2025 Scientific Solutions - All rights reserved.